
Well I have to admit that not all of my Asus UL80V function keys work on Linux. Among them are the brightness adjustment buttons. Well it's not a problem to adjust the brightness on linux anyway, I remember there was a possibility to set it manually in:
/proc/acpi/video/VGA/LCD/brightness
Sadly I failed to find the file on my current distribution (Mint 13 / Maya, based on Ubuntu 12). I made some research and searching and managed to locate another file responsible for the backlight brightness setting:
/sys/devices/pci0000:00/0000:00:01.0/0000:01:00.0/backlight/acpi_video0/brightness
The brightness may be set the following way:
sudo echo "15" > /sys/devices/pci0000:00/0000:00:01.0/0000:01:00.0/backlight/acpi_video0/brightness
This works, but is a little bit inconvenient. Now I need to find a way do bind this with the brightness increase/decrease buttons, which may be tricky since they don't appear in /dev/input/ events (or at least I haven't found a suitable event yet).
Cheers!
KR
Sunday, December 30, 2012
Saturday, December 29, 2012
Generic django forms
My last post presented a way of generating dynamic classes in python. Today I would like to present a way of applying this mechanism to Django forms, making them a bit generic. An example may be a login form, that may be used with an "accept regulations" checkbox or without it, depending on the context.
LoginForm.with_accept_regulations().with_skin_selection(), which would generate a class LoginFormWithAcceptRegulationsWithSkinSelection. I know this is starting to look like java, but the long names are meant to be descriptive :-)
Have fun exploring new possibilities.
Cheers!
KR
P.S.
I was in a hurry, so the code may have some simple mistakes - beware :-)
class LoginForm(forms.Form):
    username = forms.CharField(max_length=20, label="Username")
    password = forms.CharField(widget=forms.\
            PasswordInput(render_value=False),max_length=20, label="Password")

    def clean(self):
        #form validation/clean implementation
        pass
This a simplest login form you can get, all there is to do is to implement a login mechanism (or simply use it, it's available at the django.contrib.auth module). Both provided fields are required, so the is_valid method will generate an appropriate result. Now let's make a possibility to generate this form with an "accept regulations" which is also required.
class LoginForm(forms.Form):
    username = forms.CharField(max_length=20, label="Username")
    password = forms.CharField(widget=forms.\
            PasswordInput(render_value=False),max_length=20, label="Password")


    def clean(self):
        #form validation/clean implementation
        pass


    @classmethod
    def with_accept_regulations(cls):
        return type(
            "%sWithAcceptRegulations" % cls.__name__,
            (cls,),
            {"accept_regulations" : forms.BooleanField(required=True, \
                    label="I accept the regulations")},
Now we may easily obtain a login form with accept regulations using the with_accept_regulations class method. Example usage is presented below:if something: CurrentLoginForm = LoginForm else: CurrentLoginForm = LoginForm.with_accept_regulations() form = CurrentLoginForm(request.POST) if form.is_valid(): #and os on... passThis example is trivial, and a similar outcome may be achieved by using simpler mechanisms, however examples are suppose to be simple. This method may be applied to more demanding applications, a huge feature is the ability to chain class creation methods, for example you could try implementing the following:
LoginForm.with_accept_regulations().with_skin_selection(), which would generate a class LoginFormWithAcceptRegulationsWithSkinSelection. I know this is starting to look like java, but the long names are meant to be descriptive :-)
Have fun exploring new possibilities.
Cheers!
KR
P.S.
I was in a hurry, so the code may have some simple mistakes - beware :-)
Friday, December 28, 2012
Dynamic type creation in python
Long long time ago, in a galaxy far far away, before python 2.2+ was invented, classes and types were very different. Finally an update came and unified them. Nowadays those statements mean pretty much the same (python 2.7 / 3.X), so by stating "dynamic type creation" we actually mean "dynamic class creation" (not the other way round - this way it looks more OOP). There is a magic keyword type, which returns a type(class) of an object.
>>> class Test(object):
... pass
...
>>> inst = Test()
>>> type(inst)
<class '__main__.Test'>
This seams logic, however the type function may be also used for dynamic class creation. We have to provide a new class name, a list of base classes and some additional attributes. For example we want to create a new class that extends Test.
>>> Test2 = type("Test2", (Test,), {"my_func" : lambda self: "Hello"})
>>> Test2
<class '__main__.Test2'>
>>> Test2.__dict__
dict_proxy({'my_func': <function <lambda> at 0x12126e0>, '__module__': '__main__', '__doc__': None})
>>> inst2 = Test2()
>>> inst2.my_func()
'Hello'
This mechanism may not be so spectacular before you apply it with a sophisticated library/framework, tomorrow I'll present how to use it with django forms.
Cheers!
KR
Monday, December 17, 2012
Using table join with mysqldump
Everybody familiar with MySQL database knows mysqldump, the ultimate MySQL backup tool. This tool has more intereseting features, mainly it can be used to dump only specific tables or even selectively extract data from the database.
So if You want to dump a single table, you should execute:
mysqldump -u db_user -p db_name table_name > table_and_data.sql
This is a default script, quite useful for recreating tables/making backups. But as it was mentioned before, we just want the data. Fortunately mysqldump comes with many options, --no_create_info for instance will drum only the data wrapped by an INSERT INTO statement. Another nice option: --where enables providing custom data filtering rules (typical for MySQL). Let's try a query that dumps specific rows from a table that is related to another table using a WHERE statement on the corresponding data model.
mysqldump -u db_user -p db_name table_name --no_create_info \
--lock-all-tables --where 'id in (select tn.id from table_name as tn \
join related_table as rt on tn.related_table_id = rt.id \
where rt.some_field = 1)' > data.sql
The idea is to use a subselect to get table_name rows that have foreign keys to the related_table rows that meet the rt.some_field = 1 requirement. This works well, however if You access tables not specified in mysqldump's command params, You should lock them yourself. In this example I use --lock-all-tables which is an overkill (if You're using a transactional database engine, such as InnoDB, You can use --single-transaction instead - no table locking will be required).
Cheers!
~KR
Wednesday, December 12, 2012
Mercurial disallow pushing multiple heads
So why are multiple heads evil, and why do we want to stop hg from pushing them to another repo. Well, usually multiple heads are caused by failed merge attempts (avoiding merges). Pushing multiple heads in this situation will postpone the need of merging (it will be needed eventually), or make somebody else merge the heads. If a programmer intends to make a new head in the first place - he is likely to create a new branch.
Another reason do want to push multiple head changesets are auto build/test frameworks. If the execute hg incoming and suddenly see 3 heads instead of one. Surely they'll fail to carry on their routine.
I believe I've mentioned something about mercurial hooks and some of their applications. These hooks may be used to disallow pushing changesets with more than one head. We don't have to implement this hook by ourselves, a good implementation is available at hg.pythong.org.
mkdir ~/hooks && cd ~/hooks
wget http://hg.python.org/hooks/archive/fc6022656a7b.tar.gz -O hooks.tar.gz
tar zxf hooks.tar.gz && mv hooks-fc6022656a7b/* .
Now we need to edit, the ~/.hgrc file.
[hooks]
pretxnchangegroup.checkheads = python:/home/kr/hooks/checkheads.py:hook
Let's see how it works:
~ $ ~/prj/python/bw $ hg push
pushing to /home/kr/repos/bw
searching for changes
abort: push creates new remote head 4ffea01f3220!
(did you forget to merge? use push -f to force)
This was to be expected, by default mercurial required the -f switch to push a changeset containing multiple heads.
~ $ hg push -f
pushing to /home/kr/repos/bw
searching for changes
adding changesets
adding manifests
adding file changes
added 1 changesets with 1 changes to 1 files (+1 heads)
* You are trying to create new head(s) on 'default'!
* Please run "hg pull" and then merge at least two of:
* c96b37d67e47, 4ffea01f3220
transaction abort!
rollback completed
abort: pretxnchangegroup.checkheads hook failed
This hook gives +10 to keeping your repo tidy!
Cheers!
KR
P.S.
There are some more hooks in the downloaded archive, feel free to check them out.
Thursday, November 29, 2012
NumPy arrays vs regular arrays - common operations
NumPy is a set of scientific computing tools for python. I'm not going to talk about them, I mentioned NumPy, because it comes with an optimized array type numpy.array. Unlike casual python arrays, numpy.arrays work well with matrix/vector operators.
Arrays and numpy.arrays do not share a common interface, but they both support iteration and support the __setitem__ and __getitem__ methods. The first thing that differs is the initialization (obviously):
It's almost the same, you can iterate over both tables, set and get array elements. However when you want to add / remove elements you have to act differently - by using NumPy provided methods:
The prime difference here, is that casual array element deletion modifies the object, while np.delete creates a deep copy and than applies the effect. Numpy.append works in a similar maner, but instead it concatenates arrays (or adds elements).
Now lets look at the filter function, these to instructions are equivalent:
And for the map function:
Let's move on, and see where NumPy arrays have some more potential: vector operations. Let's suppose we want to make a sum of 2 vectors. Using regular python arrays you have to combine elements with the zip / sum functions, or just iterate and create sums on the fly. Example solution:
Now for the NumPy solution:
And this works for all python binary operators, this is just awesome. When doing 'scientific' stuff, it's good to use appropriate data types. What's more, NumPy is very popular among other projects, so seeing numpy.array's from time to time doesn't surprise nobody. I guess matrices and more complex operations will be covered some other day.
Cheers!
KR
Arrays and numpy.arrays do not share a common interface, but they both support iteration and support the __setitem__ and __getitem__ methods. The first thing that differs is the initialization (obviously):
>>> import numpy as np
>>> a = np.array([1,2,3,4,5])
>>> b = [1,2,3,4,5]
>>> a
array([1, 2, 3, 4, 5])
>>> b
[1, 2, 3, 4, 5]
It's almost the same, you can iterate over both tables, set and get array elements. However when you want to add / remove elements you have to act differently - by using NumPy provided methods:
 >>> np.delete(a, 2)
array([1, 2, 4, 5])
>>> del b[2]
>>> b
[1, 2, 4, 5]
The prime difference here, is that casual array element deletion modifies the object, while np.delete creates a deep copy and than applies the effect. Numpy.append works in a similar maner, but instead it concatenates arrays (or adds elements).
Now lets look at the filter function, these to instructions are equivalent:
>>> filter(lambda x: x>2, b)
[3, 4, 5]
>>> a[a>2]
array([3, 4, 5])
And for the map function:
>>> np_map = np.vectorize(lambda x: x**2)
>>> np_map(a)
array([ 1,  4,  9, 16, 25])
>>> map(lambda x: x**2, b)
[1, 4, 9, 16, 25]
Let's move on, and see where NumPy arrays have some more potential: vector operations. Let's suppose we want to make a sum of 2 vectors. Using regular python arrays you have to combine elements with the zip / sum functions, or just iterate and create sums on the fly. Example solution:
>>> b = [1,2,3,4,5]
>>> d = [3,3,3,4,4]
>>> map(lambda x: sum(x), zip(b,d))
[4, 5, 6, 8, 9]
Now for the NumPy solution:
>>> a = np.array([1,2,3,4,5])
>>> b = np.array([3,3,3,4,4])
>>> a + b
array([4, 5, 6, 8, 9])
And this works for all python binary operators, this is just awesome. When doing 'scientific' stuff, it's good to use appropriate data types. What's more, NumPy is very popular among other projects, so seeing numpy.array's from time to time doesn't surprise nobody. I guess matrices and more complex operations will be covered some other day.
Cheers!
KR
Tuesday, November 27, 2012
Exporting MySQL queries into a CSV file.
Every now and then I need to do some non-standard data processing things, which requires grabbing a bit of data from a database. Usually this "non-standard data processing things" are simple scripts, and enhancing them to get data directly from a database would kill their main advantages: simplicity and a fast setup time.
CSV files are way better for this kind of processing. Since the data is located in a database, not a CSV file, we'll have to export it. Now there are two basic ways:
a) The MySQL geek way.
b) The bash/sh geek way.
So let's start with the pure MySQL way. Usually when queries are made using the standard mysql console client, the retrieved data is formated into something that should reassemble a table... well maybe it does, but "broad" result tables aren't readable anyway.
All we have to do is change the field and line terminator to match our needs. About the file, you should pass a path that is writable for the mysql user. If the file exists, or the MySQL server has no write permissions, this query will fail.
Let's move on to the bash geek way - personally I don't fancy MySQL trciks, therefore I usually rely on bash. So here we go:
Both approaches have some advantages and disadvantages, so their usage should be dependent on the context.
CSV files are way better for this kind of processing. Since the data is located in a database, not a CSV file, we'll have to export it. Now there are two basic ways:
a) The MySQL geek way.
b) The bash/sh geek way.
So let's start with the pure MySQL way. Usually when queries are made using the standard mysql console client, the retrieved data is formated into something that should reassemble a table... well maybe it does, but "broad" result tables aren't readable anyway.
select * from some_table into outfile "/tmp/output.csv" \
fields terminated by ";" lines terminated by "\n";
All we have to do is change the field and line terminator to match our needs. About the file, you should pass a path that is writable for the mysql user. If the file exists, or the MySQL server has no write permissions, this query will fail.
Let's move on to the bash geek way - personally I don't fancy MySQL trciks, therefore I usually rely on bash. So here we go:
echo "select * from some_table;" | \
mysql -u my_usr -p my_db | sed 's/\t/;/g' | \
tail -n +2 > /home/chriss/output.csv
We execute a query, passing it via an input stream to the MySQL client. The client returns a tab separated list of fields (one per line), sed replaces those with semicolons. Next we dispose of the first line (using tail), since it contains column names. Finally we save the output as a file. Unlike in the MySQL way, you can write the file according to your write permissions, not mysql's users.
Both approaches have some advantages and disadvantages, so their usage should be dependent on the context.
Friday, November 23, 2012
Django admin: handling relations with large tables
One of the reasons, that Django became so popular, is that it provides a set of flexible administrative tools. You may setup your data management dashboard in relatively short time using some predefined classess.
A typical object admin view consists of a ModelForm of an appropriate model, and some basic actions (save, add, delete). As you probably know, foreign keys are often represented as HTML select inputs. This works cool, when the related table is not vertically long, for example: electronic equipment brands. In such cases the combobox works well.
Imagine a situation when, the foreign key points to a user record, a purchase order, or any other relation that does not have a limited number of rows. According to the previous example, the combo box should have thousands of options. This is a real performance killer, the ORM has to fetch the whole user/purchase order table in order to display a single object in an editable admin view. Don't be surprised if your query gets killed with the "2006 - MySQL server has gone away" status.
There is a simple way to solve this: instead of selecting the whole table for presenting available options, we may present only the currently related object (its primary key). To achieve this, we must mark the foreign keys as raw_id_fields. Below sample usage:
Yes, it's as simple as that. Keep in mind, that in many cases using raw id fields won't be necessary, but when it come to vertically huge tables - it's a good time/performance saving solution.
Cheers!
KR
A typical object admin view consists of a ModelForm of an appropriate model, and some basic actions (save, add, delete). As you probably know, foreign keys are often represented as HTML select inputs. This works cool, when the related table is not vertically long, for example: electronic equipment brands. In such cases the combobox works well.
Imagine a situation when, the foreign key points to a user record, a purchase order, or any other relation that does not have a limited number of rows. According to the previous example, the combo box should have thousands of options. This is a real performance killer, the ORM has to fetch the whole user/purchase order table in order to display a single object in an editable admin view. Don't be surprised if your query gets killed with the "2006 - MySQL server has gone away" status.
There is a simple way to solve this: instead of selecting the whole table for presenting available options, we may present only the currently related object (its primary key). To achieve this, we must mark the foreign keys as raw_id_fields. Below sample usage:
class PurchaseReportAdmin(admin.ModelAdmin):
    #(...) other fields
    raw_id_fields = ['purchase_order']
admin.site.register(PurchaseReport, PurchaseReportAdmin )
Yes, it's as simple as that. Keep in mind, that in many cases using raw id fields won't be necessary, but when it come to vertically huge tables - it's a good time/performance saving solution.
Cheers!
KR
Wednesday, November 14, 2012
Selenium Firefox WebDriver and proxies.
Selenium is an functional web application testing system. It really helps developing test cases for apps that have a lot of logic implemented in the frontend layer. Selenium provides WebDrivers for most popular browsers, like IE, Chrome and last buy not least: Firefox. Of course Selenium has python bindings, which makes it even better.
Suppose you need to use proxy servers for some of your scenarios (unique visitors). Since each test case may use many proxies, changing the global system proxy settings is a rather bad idea. Fortunately HTTP proxies may be configured in a web browser. If you inspect the Firefox about:config panel, you will notice many properties that configure how your browser really acts. We'll be interested in the network.proxy.* settings.
First we need to configure our profile by setting the HTTP, and HTTPS proxies. Secondly we have to tell Firefox to start using them: network.proxy.type -> 1. Finally we create an instance of Firefox with our proxy settings and execute out test routine.
Have fun!
~KR
Suppose you need to use proxy servers for some of your scenarios (unique visitors). Since each test case may use many proxies, changing the global system proxy settings is a rather bad idea. Fortunately HTTP proxies may be configured in a web browser. If you inspect the Firefox about:config panel, you will notice many properties that configure how your browser really acts. We'll be interested in the network.proxy.* settings.
from selenium import webdriver
from selenium.common.exceptions import TimeoutException

try:
    proxy = "192.168.1.3"
    port = 8080

    fp = webdriver.FirefoxProfile()
    fp.set_preference('network.proxy.ssl_port', int(port))
    fp.set_preference('network.proxy.ssl', proxy)
    fp.set_preference('network.proxy.http_port', int(port))
    fp.set_preference('network.proxy.http', proxy)
    fp.set_preference('network.proxy.type', 1)

    browser = webdriver.Firefox(firefox_profile=fp)
    browser.set_page_load_timeout(15)
    browser.get('http://192.168.1.1/test')
    print browser.find_element_by_id('my_div').text

except TimeoutException as te:
    print "timeout"
except Exception as ex:
    print ex.message
finally:
    browser.quit()
First we need to configure our profile by setting the HTTP, and HTTPS proxies. Secondly we have to tell Firefox to start using them: network.proxy.type -> 1. Finally we create an instance of Firefox with our proxy settings and execute out test routine.
Have fun!
~KR
Thursday, November 8, 2012
Python 2.7 forward compatibility with python 3.X
As many of You know, python is such a strange language, that releases are not backward compatible. Ok, it's really not that bad, the problem only occurs when migrating from python 2.X to 3.X. Features introduced in python 3 greatly increase the interpreter performance (such as decimal number processing, function annotations) and provide other useful mechanisms (ex. exception chaining). Some of this things were technically not possible to achieve in python 2.X, so thats where the conflicts come from.
So if python 3 is that awesome, why do people still use python 2.7 (or older versions)? Most existing python frameworks and libraries do not support python 3, they are being ported but it will take some time for the whole python community to move on to the currently proposed version.
So if you plan migrating to python 3 in the future, you best use the __future__ module. This module provides some basic forward compatibility for older versions of python. Two major differences that may crash your code are the print statement and literals encoding. You may observe __future__ below, first the print function:
>>> print "test"
test
>>> from __future__ import print_function
>>> print "test"
File "<stdin>", line 1
print "test"
^
SyntaxError: invalid syntax
>>> print("test")
test
>>>
After importing print_function you are obligated to use print as a function. And now for unicode literals:
>>> isinstance("test", str)
True
>>> isinstance("test", unicode)
False
>>> from __future__ import unicode_literals
>>> isinstance("test", str)
False
>>> isinstance("test", unicode)
True
>>> "test"
u'test'
>>>
All string are now by default encoded as unicode... personally I'm happy with it, since I really hated the "Ascii codec can't decode..." errors.
Tuesday, October 30, 2012
Evaluating minimum/maximum regex match length.
The application of regular expressions in data validations is a standard nowadays. A good regular expression in the right context may save the day, I believe no one can deny it. However, sometimes you (or other people using your software) need some more feedback if the provided data fails to match the test pattern. A typical situation may look like this:
Running this code results in the following output:
OK: agent james bond
OK: secret agent 007
Incorrect user ID: agent jack black
Incorrect user ID: agent j
So what if we want to give a hint, about the minimum and maximum length? In many cases guessing/manually evaluating the potential match size should be easy. However, if You plan using some more sophisticated regular expressions, You should not rely on Your intuition - but on calculations:
This time the output should look like this:
OK: agent james bond
OK: secret agent 007
Incorrect user ID: agent jack black
User ID agent j should be between 9 and 23 characters
It certainly is more descriptive.
Cheers!
~KR
def test_id(user_id):
    import re
    regex = r"(secret\s?)?agent\s([0-9]{3}|james bond)"

    if not re.match(regex, user_id):
        print "Incorrect user ID: %s" % user_id
    else:
        print "OK: %s" % user_id

test_id('agent james bond')
test_id('secret agent 007')
test_id('agent jack black')
test_id('agent j')
Running this code results in the following output:
OK: agent james bond
OK: secret agent 007
Incorrect user ID: agent jack black
Incorrect user ID: agent j
So what if we want to give a hint, about the minimum and maximum length? In many cases guessing/manually evaluating the potential match size should be easy. However, if You plan using some more sophisticated regular expressions, You should not rely on Your intuition - but on calculations:
def test_id(user_id):
    import re
    import sre_parse

    regex = r"(secret\s?)?agent\s([0-9]{3}|james bond)"
    match_range = sre_parse.parse(regex).getwidth()

    if len(user_id) < match_range[0] or \
            len(user_id) > match_range[1]:
        print "User ID %s should be between %s and %s characters" % \
                (user_id, match_range[0], match_range[1])
    elif not re.match(regex, user_id):
        print "Incorrect user ID: %s" % user_id
    else:
        print "OK: %s" % user_id


test_id('agent james bond')
test_id('secret agent 007')
test_id('agent jack black')
test_id('agent j')
This time the output should look like this:
OK: agent james bond
OK: secret agent 007
Incorrect user ID: agent jack black
User ID agent j should be between 9 and 23 characters
It certainly is more descriptive.
Cheers!
~KR
Saturday, October 27, 2012
Determine Django form field clean order
Django provides some excellent out-of-the-box form validation/processing mechanisms. These include casual forms, model based forms, and formsets. One of their features is the ease of implementing data validation procedures. According to the documentation, the validation process includes executing the following methods in the presented order:
All methods implemented in this example refer to step 5: clean_<fieldname>. So what would be the execution order if we try validating MyForm? Django manual states:
"These methods are run in the order given above, one field at a time. That is, for each field in the form (in the order they are declared in the form definition), the Field.clean() method (or its override) is run, then clean_<fieldname>(). Finally, once those two methods are run for every field, the Form.clean() method, or its override, is executed."
According to this statement, the expected order would be: clean_base_field1, clean_base_field2, field1. What if we don't like this order, should we rearrange the form definition? No such thing! There is a way change this order in a more elegant way. We may use fields.keyOrder to achieve it:
You don't need to extend a form to use this. You may also specify a partial order (if there are to many fields to be named explicitly) by putting only a few field names in the array and extending it by a list comprehension generated from the remaining self.fields.keys().
Cheers!
~KR
- to_python (field)
- validate (field)
- run_validators (field)
- clean (field)
- clean_<fieldname> (form)
- clean (form)
class MyBaseForm(forms.Form):
    base_field1 = forms.CharField()
    base_field2 = forms.CharField()

    def clean_base_field1(self):
        #(...)
        return self.cleaned_data['base_field1']

    def clean_base_field2(self):
        #(...)
        return self.cleaned_data['base_field2']

class MyForm(MyBaseForm):
    field1 = forms.CharField()

    def clean_field1(self):
        #(...)
        return self.cleaned_data['field1']
All methods implemented in this example refer to step 5: clean_<fieldname>. So what would be the execution order if we try validating MyForm? Django manual states:
"These methods are run in the order given above, one field at a time. That is, for each field in the form (in the order they are declared in the form definition), the Field.clean() method (or its override) is run, then clean_<fieldname>(). Finally, once those two methods are run for every field, the Form.clean() method, or its override, is executed."
According to this statement, the expected order would be: clean_base_field1, clean_base_field2, field1. What if we don't like this order, should we rearrange the form definition? No such thing! There is a way change this order in a more elegant way. We may use fields.keyOrder to achieve it:
class MyForm(MyBaseForm):
    field1 = forms.CharField()

    def clean_field1(self):
        #(...)
        return self.cleaned_data['field1']

    def __init__(self, *args, **kwargs):
        super(MyForm, self).__init__(*args, **kwargs)
        self.fields.keyOrder = ['base_field1', 'field1', 'base_field2']
You don't need to extend a form to use this. You may also specify a partial order (if there are to many fields to be named explicitly) by putting only a few field names in the array and extending it by a list comprehension generated from the remaining self.fields.keys().
Cheers!
~KR
Tuesday, October 23, 2012
Hard links vs. symbolic links
Everybody uses links in his everyday virtual life. I don't think anyone could imagine navigating between websites without using hyper-refs, but let's move to links that refer to our file-system. If You had some experience with MS Windows before, You're probably familiar with symbolic links, aka shortcuts.
In general symbolic links may be interpreted as pointers directed to our files logical layer. In a larger scope this may look like a pointer to the pointer of physical data. If this still looks confusing, have a look at an example:
~ $ echo "Test file" > f1.txt
~ $ ln -s f1.tx f2.txt
This may be visualized the following way ("Test file" is the physical data here):
 Now you can access the physical data using both f1.txt and f2.txt. However, if You delete f1.txt, the physical data will be lost (no label will point to it). A different situation occurs when You use hard links instead. Each time You create a file, a label is hard linked to it. In the previous example the hard link was created by executing:
~ $ echo "Test file" > f1.txt
By default each chunk of physical data has only 1 hard link attached, but more may be attached. For example:
~ $ ln f1.txt f2.txt
Will create a hard link with label f2.txt to the physical data of f1.txt, let's visualize it:
 You can access the physical data both via f1.txt and f2.txt. Unlike symbolic links, each of the hard links works even if the other stops to exist. In order to delete the physical data you need to unlink all hard links that point to it (rm f1.txt alone will not do...).
To sum up, symbolic links are cool because they operate on the logical layer, and thus are not limited to a single file system. Furthermore symbolic links may point to directories which is an important feature.
Hard links also have some features that their symbolic cousins have not. Hard links are always bound the the physical source of data, thus making them move/rename proof (symbolic links are not updated if you move/rename a corresponding hard link).
Hope this overview helps you to choose a right link for each situation.
Cheers!
~KR
In general symbolic links may be interpreted as pointers directed to our files logical layer. In a larger scope this may look like a pointer to the pointer of physical data. If this still looks confusing, have a look at an example:
~ $ echo "Test file" > f1.txt
~ $ ln -s f1.tx f2.txt
This may be visualized the following way ("Test file" is the physical data here):

~ $ echo "Test file" > f1.txt
By default each chunk of physical data has only 1 hard link attached, but more may be attached. For example:
~ $ ln f1.txt f2.txt
Will create a hard link with label f2.txt to the physical data of f1.txt, let's visualize it:

To sum up, symbolic links are cool because they operate on the logical layer, and thus are not limited to a single file system. Furthermore symbolic links may point to directories which is an important feature.
Hard links also have some features that their symbolic cousins have not. Hard links are always bound the the physical source of data, thus making them move/rename proof (symbolic links are not updated if you move/rename a corresponding hard link).
Hope this overview helps you to choose a right link for each situation.
Cheers!
~KR
Monday, October 15, 2012
Renaming Mercurial branches
I believe there is no need to present Mercurial (since You got here, You should be familiar with it anyway). I'd like to present a way of renaming / replacing branches. By default, without using extensions, it's impossible ("branches are permanent and global...")... but there are other ways to deal with it. Let us suppose we want to rename branch A to B. We can achieve it the following way:
hg update A
last_head=$(hg id -i)
hg ci -m "close A" --close-branch
hg update $last_head
hg branch B
hg ci -m "branche renamed to B"
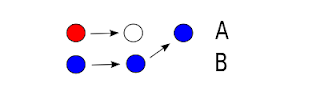
This is it, now our branch is named B. In practice we just closed branched A and created a new branch B from the last commit. This activity may be visualized the following way:
 Replacing an existing branch with another is a bit more tricky, here's what you have to do:
hg update A
hg ci -m "close A" --close-branch
hg update B
hg branch A -f #force, branch A exists
hg ci "rename to A"
#optional close branch B
The general idea may be presented the following way:
In order to create a branch that previously existed we have to use the force switch (hg branch). Nothing should go wrong if the previous head of branch A was closed, else You'll just end up creating another head.
Experimenting with hg is cool, just remember - before You try anything experimental, commit your work! This may save You a lot of nerves.
Cheers!
~KR
hg update A
last_head=$(hg id -i)
hg ci -m "close A" --close-branch
hg update $last_head
hg branch B
hg ci -m "branche renamed to B"
This is it, now our branch is named B. In practice we just closed branched A and created a new branch B from the last commit. This activity may be visualized the following way:

hg update A
hg ci -m "close A" --close-branch
hg update B
hg branch A -f #force, branch A exists
hg ci "rename to A"
#optional close branch B
The general idea may be presented the following way:

In order to create a branch that previously existed we have to use the force switch (hg branch). Nothing should go wrong if the previous head of branch A was closed, else You'll just end up creating another head.
Experimenting with hg is cool, just remember - before You try anything experimental, commit your work! This may save You a lot of nerves.
Cheers!
~KR
Saturday, October 13, 2012
Serve text file via HTTP protocol using netcat
Unix based system provide a lot of cool network tools, today I'd like to show the potential of netcat. Netcat is a utility that may be used for "just about anything under the sun involving TCP and UDP" (netcat BSD manual) . Thats a pretty description, but let's go on to some practical stuff.
If we want to make a useful script, we should make it work with a popular protocol, such as HTTP. This way we don't have to worry about potential client application, we may use an ordinary web browser to test our script. More formal information about the HTTP protocol can be found in RFC2616.
So a bash script that generates a simple HTTP response and serves a text file may look like this:
If a HTTP client receives such a response, it should try to save the attached data as a file (a typical save-file-as window in a web browser).
Since we have a HTTP response generate, we need to create a server that will serve it - that's where netcat comes in handy. To serve some data we need to run it in the listening mode. For example :
~ $ ./ncserve.sh test.txt | nc -l 8888
If you now enter http://127.0.0.1:8888 (or your other IP) in a webbrowser, you should be able to download text.txt file. You may also test it using curl:
~ $ curl -X GET 127.0.0.1:8888
HTTP/1.1 200 OK
Date: Sat Oct 13 10:40:27 UTC 2012
Server: NetCatFileServe
Last-Modified: Sat Oct 13 10:40:27 UTC 2012
Accept-Ranges: bytes
Content-Length: 71
Content-Type: application/force-download
Content-Disposition: attachment; filename="test.txt"
This is a simple text file
bla bla bla
downloaded via netcatserver
:-)
This script only serve a file once and dies, if you want it to act like a regular HTTP server you should run it in a infinite loop.
Cheers!
~KR
If we want to make a useful script, we should make it work with a popular protocol, such as HTTP. This way we don't have to worry about potential client application, we may use an ordinary web browser to test our script. More formal information about the HTTP protocol can be found in RFC2616.
So a bash script that generates a simple HTTP response and serves a text file may look like this:
if [ -z "$1" ]
then
    echo "Usage: $0 <text file to serve>"
    exit 1
fi

filename=$1

echo "
HTTP/1.1 200 OK
Date: $(LANG=en_US date -u)
Server: NetCatFileServe
Last-Modified: $(LANG=en_US date -u)
Accept-Ranges: bytes
Content-Length: $(cat $filename | wc -c  | cut -d " " -f 1)
Content-Type: application/force-download
Content-Disposition: attachment; filename=\"$filename\"

$(cat $filename)
"
If a HTTP client receives such a response, it should try to save the attached data as a file (a typical save-file-as window in a web browser).
Since we have a HTTP response generate, we need to create a server that will serve it - that's where netcat comes in handy. To serve some data we need to run it in the listening mode. For example :
~ $ ./ncserve.sh test.txt | nc -l 8888
If you now enter http://127.0.0.1:8888 (or your other IP) in a webbrowser, you should be able to download text.txt file. You may also test it using curl:
~ $ curl -X GET 127.0.0.1:8888
HTTP/1.1 200 OK
Date: Sat Oct 13 10:40:27 UTC 2012
Server: NetCatFileServe
Last-Modified: Sat Oct 13 10:40:27 UTC 2012
Accept-Ranges: bytes
Content-Length: 71
Content-Type: application/force-download
Content-Disposition: attachment; filename="test.txt"
This is a simple text file
bla bla bla
downloaded via netcatserver
:-)
This script only serve a file once and dies, if you want it to act like a regular HTTP server you should run it in a infinite loop.
Cheers!
~KR
Sunday, September 30, 2012
Regular expression based process termination in linux.
Even though Unix-based systems are generally stable, some processes (usually non-kernel) could benefit from a kill from time to time. GUI applications may hang, some batch programs may have memory leaks, there are many things that can go wrong. Fortunately Linux provides a set of tools that may help in such situations, you can use the ps command to list active processes. It reports a snapshot of a process granting you information about the process id (PID), parent process id (PPID), priority, memory usage, current state and more. There are also kill and pkill commands which may terminate a process identified by a specific id or executable name respectively.
If you are running multiple instances of a program, and you want to terminate only a few of them its hard to apply the presented commands - pkill will terminate all instances (that is not desired), while kill will require you to obtain PIDs (this requires some work). It may be easier to locate the mentioned processes by their command line arguments, execution paths or other run parameters, literally or using regular expressions.
The following script does the job:
First a process list is obtained and adjusted for further processing (the text output is so lousy...). Using cut preserves only the third column (PID) and everything beyond the 13-th (whitespace separated application name with additional parameters). Next we match the output with a provided extended regular expression (ERE), be warned though - the tested string starts with the process ID so starting the ERE with a "^" is a bad idea (starting with "^[0-9]+" may work, but you'll eventually end up with restarting your system :-)).
Cheers!
~KR
If you are running multiple instances of a program, and you want to terminate only a few of them its hard to apply the presented commands - pkill will terminate all instances (that is not desired), while kill will require you to obtain PIDs (this requires some work). It may be easier to locate the mentioned processes by their command line arguments, execution paths or other run parameters, literally or using regular expressions.
The following script does the job:
if [ "$1" ]
then
    ps lax  | tr -s ' ' | cut -d ' '  -f 3,13- | \
    egrep "$1" | cut -d ' ' -f 1 | \
    xargs kill -9 2>/dev/null
else
    echo "Usage: $0 <extended regular expresion>"
fi
First a process list is obtained and adjusted for further processing (the text output is so lousy...). Using cut preserves only the third column (PID) and everything beyond the 13-th (whitespace separated application name with additional parameters). Next we match the output with a provided extended regular expression (ERE), be warned though - the tested string starts with the process ID so starting the ERE with a "^" is a bad idea (starting with "^[0-9]+" may work, but you'll eventually end up with restarting your system :-)).
Cheers!
~KR
Friday, September 28, 2012
Setting up a custom bash prompt
If you spend a lot of time exploiting the terminal not only on a single PC, but also on other servers via ssh, it is a good practice to have your bash prompt properly configured. If all your command prompts looks like this (example):
~ chriss $
it's almost impossible to determine your current location (server, directory, only a user - which may be common for all machines). The whole magic behind bash prompt configuration is in the $PS1 environment variable. There are also variables $PS2, $PS3, $PS4, but $PS1 is used as the primary bash prompt string.
So let's create two prompts, one for each server your are usually connecting via ssh, and one for your local machine. Lets look at the possibilities :
export PS1="~ \u \w $"
Which results in:
~ kr ~/prj/python $
It's easy, if you don't see no hostname on the prompt, you're probably still on the local machine. Displaying the working directory may save you a lot of ls / pwd executions.
If you're connected to a remote machine, it's best to have a greater context. A good option beside the username i the hostname (full if you're having problems differentiating remote machines using only the first subdomain), the current working directory has proven useful not only on remote machines, and finally - if you're connecting to different time zones, it's a good idea to display the system time. Summing up, we would end up with something like this:
export PS1="[\A] \u@\H \W $"
This will result in the following prompt message:
[21:45] kr@some.secret.server current_dir $
This way you will never get confused about your terminal session. Remember that this only sets the prompt for the current session, if you want your prompt to get configured every time you start a session, you should apply this code to your ~/.bashrc file.
Cheers!
~KR
~ chriss $
it's almost impossible to determine your current location (server, directory, only a user - which may be common for all machines). The whole magic behind bash prompt configuration is in the $PS1 environment variable. There are also variables $PS2, $PS3, $PS4, but $PS1 is used as the primary bash prompt string.
So let's create two prompts, one for each server your are usually connecting via ssh, and one for your local machine. Lets look at the possibilities :
- \d : string date representation
- \e : an escape character
- \h : hostname sub-domain
- \H : full hostname domain
- \j : current job count
- \n : newline character
- \t : time / 24h HH:MM:SS
- \T : time / 12h HH:MM:SS
- \@ : time / 12h HH:MM
- \A : time / 24h HH:MM
- \u : username
- \w : current directory relative to $HOME
- \W : current directory
export PS1="~ \u \w $"
Which results in:
~ kr ~/prj/python $
It's easy, if you don't see no hostname on the prompt, you're probably still on the local machine. Displaying the working directory may save you a lot of ls / pwd executions.
If you're connected to a remote machine, it's best to have a greater context. A good option beside the username i the hostname (full if you're having problems differentiating remote machines using only the first subdomain), the current working directory has proven useful not only on remote machines, and finally - if you're connecting to different time zones, it's a good idea to display the system time. Summing up, we would end up with something like this:
export PS1="[\A] \u@\H \W $"
This will result in the following prompt message:
[21:45] kr@some.secret.server current_dir $
This way you will never get confused about your terminal session. Remember that this only sets the prompt for the current session, if you want your prompt to get configured every time you start a session, you should apply this code to your ~/.bashrc file.
Cheers!
~KR
Monday, September 24, 2012
Logging JavaScript exceptions using raven-js and sentry.
Let's face it, its hard to obtain 100% unit-test code coverage, likewise it's nearly impossible to implement functional tests for all possible scenarios. A good way of recognizing problems and locating them is logging exceptions and other informative messages. For small projects logging to std out/err or files is fine, but if there are hundreds of people exploiting your application every minute you should think of a more scalable solution.
Sentry is a good option, it's a real-time event logging platform that may be set-up as a standalone application. Other pros are:
~ virtualenv --no-site-packages sentry_env && cd sentry_env
~ source bin/activate
(sentry_env) ~ pip install sentry
(sentry_env) ~ sentry init
Now all you have to configure database access and other important parameters, check out the sentry configuration guide for more information.
But let's get back to the main thought. Among programming languages that have clients for sentry there is also JavaScript. This wouldn't be a surprise if not for the fact that (besides node.js) JS is usually executed on the client side (web browser). Raven-js (don't confuse it the client for RavenDB) can log messages / catch exceptions and send them via AJAX requests to your sentry application. In order to set up the logging script you should first configure sentry and create a project and obtain generated project public key. Then use the following code:
Setting up raven-js and observing how your scripts crash on IE is just priceless :-)
~KR
Sentry is a good option, it's a real-time event logging platform that may be set-up as a standalone application. Other pros are:
- support of different levels of logging / dynamic filtering
- logging data from many independent projects
- presistent log storing (database)
- user privilege configuration / email notification
- there are clients for many popular programming languages
- it's based on python/django
- it's based on python/django
- it's based on python/django
- ....
~ virtualenv --no-site-packages sentry_env && cd sentry_env
~ source bin/activate
(sentry_env) ~ pip install sentry
(sentry_env) ~ sentry init
Now all you have to configure database access and other important parameters, check out the sentry configuration guide for more information.
But let's get back to the main thought. Among programming languages that have clients for sentry there is also JavaScript. This wouldn't be a surprise if not for the fact that (besides node.js) JS is usually executed on the client side (web browser). Raven-js (don't confuse it the client for RavenDB) can log messages / catch exceptions and send them via AJAX requests to your sentry application. In order to set up the logging script you should first configure sentry and create a project and obtain generated project public key. Then use the following code:
Setting up raven-js and observing how your scripts crash on IE is just priceless :-)
~KR
Tuesday, September 18, 2012
Recursive call optimization
Every programmer sooner or later develops his first recursive function (common examples are calculating a factorial or a Fibonacci number). Recursive functions are usually quite easy to understand and implement, however they may lack performance - especially tail-recursive calls (I don't want to get too much in to low-level programming, but if you're really interested there are tons of articles about it).
A tail recursive call occurs when the last instruction in your function is a function call. Something like this:
Now this is one useless piece of code, but it will be a good educational example. Here's what you get when you execute it:
Interesting, this code raises a runtime error stating that that our recursion stack is full. Python has a default recursion limit of 1000 ( sys.getrecurionlimit ) which prevents stack overflows (yes, this is even worse than a runtime error), so increasing the limit will not solve our problem. An obvious solution is replacing tail recursion with an iteration (it's always possible), many compilable languages will optimize this function in the mentioned way, but since python is a scripting language it does not make such straightforward moves - you are responsible for optimizing the code yourself.
In our case:
Cheers!
~KR
A tail recursive call occurs when the last instruction in your function is a function call. Something like this:
def tail_rec_func(x):
    if x > 0:
        return tail_rec_func(x-1)
    else:
        return 0
Now this is one useless piece of code, but it will be a good educational example. Here's what you get when you execute it:
>>> tail_rec_func(5)
0
>>> tail_rec_func(1000)
(...)
RuntimeError: maximum recursion depth exceeded
Interesting, this code raises a runtime error stating that that our recursion stack is full. Python has a default recursion limit of 1000 ( sys.getrecurionlimit ) which prevents stack overflows (yes, this is even worse than a runtime error), so increasing the limit will not solve our problem. An obvious solution is replacing tail recursion with an iteration (it's always possible), many compilable languages will optimize this function in the mentioned way, but since python is a scripting language it does not make such straightforward moves - you are responsible for optimizing the code yourself.
In our case:
def iter_tail_rec_func(x):
    while 1:
        if x > 0:
            x -= 1
        else:
            return 0
If you frequently implement tail recursive functions, you had better implement a decorator that converts them to iterations or someday you may find your code crashing with a runtime/stack overflow error.Cheers!
~KR
Saturday, September 8, 2012
Dynamic class attribute access (get/set) via string names
Today I'd like to share some of my experience concerning dynamic class attribute access in python. In most cases you can easily predict the attributes you will want to access, but sometimes - especially when the attributes/fields depend on some input data this may be a problem.
There are 3 magic python build in functions that may help a lot: setattr, getattr, hasattr responsible for setting, getting named class attributes and checking if they exist, respectively.
A simple example to get familiar how it works:
Since getattr supports default values, you can manage without using hasattr.
These functions are great, when you can't predict what attributes you will need to access or when you are not sure whether some attributes are set. A good usage example are global configuration files. For example in django:
Just keep in mind that using by using setattr you may override ANY attribute, so make sure you implement some validation mechanisms. And if you ever need it - deleting attributes is also possible, try delattr.
~KR
There are 3 magic python build in functions that may help a lot: setattr, getattr, hasattr responsible for setting, getting named class attributes and checking if they exist, respectively.
A simple example to get familiar how it works:
>>> class A():This is quite intuitive, you may use these methods to update class attributes according to a dict:
... pass
...
>>> my_cls = A()
>>> hasattr(my_cls, 'test_attr')
False
>>> my_cls.test_attr
Traceback (most recent call last):
File "<stdin>", line 1, in <module>
AttributeError: A instance has no attribute 'test_attr'
>>> setattr(my_cls, 'test_attr', 'some value')
>>> hasattr(my_cls, 'test_attr')
True
>>> my_cls.test_attr
'some value'
>>> getattr(my_cls, 'test_attr', 'default_value')
'some value'
>>> my_dict = {'attr1': 1, 'attr2' : 5, 'attr3' : 10}
>>> for k,v in my_dict.items():
...     setattr(my_cls, k, v)
...
>>> my_cls.attr1
1
>>> getattr(my_cls, "attr3", -1)
10
>>> getattr(my_cls, "attr4", -1)
-1
Since getattr supports default values, you can manage without using hasattr.
These functions are great, when you can't predict what attributes you will need to access or when you are not sure whether some attributes are set. A good usage example are global configuration files. For example in django:
from django.conf import settings


some_param = getattr(settings, 'MY_CONF_PARAM',  100)
Just keep in mind that using by using setattr you may override ANY attribute, so make sure you implement some validation mechanisms. And if you ever need it - deleting attributes is also possible, try delattr.
~KR
Thursday, August 30, 2012
Extracting data from excel spreadsheets (xls) using xlrd
So what do you usually say when somebody asks you to extract some data from an excel spreadsheet for additional processing? I believe something like: "--beep--, can't you convert it to CSV?" (censored). Usually converting a spreadsheet to CSV is THE way to go.
Unfortunately sometimes such spreadsheets have to stay up to date and people keep modifying them. And when it comes to using formulas, maintaining a spreadsheet is a must (CSV preserves only final values).
I had such a situation in one of my past projects, clients uploaded XLS files via a web form and a python script had to decode appropriate evaluated cells and load them to the database. There are many platform dependent (windows) packages for this purpose requiring some M$ Office DLLs present, but since I didn't want to deploy this application on windows I started looking for a cross-platform solution. I decided to used xlrd, a cross-platform tool compatible with python 2.7. You can get it using pip:
Now for an example:
It's quite easy, however its best to implement some mapping function, so you don't have to evaluate the column number for every letter (cell AXC, 19221 could be quite tricky ;-))
~KR
Unfortunately sometimes such spreadsheets have to stay up to date and people keep modifying them. And when it comes to using formulas, maintaining a spreadsheet is a must (CSV preserves only final values).
I had such a situation in one of my past projects, clients uploaded XLS files via a web form and a python script had to decode appropriate evaluated cells and load them to the database. There are many platform dependent (windows) packages for this purpose requiring some M$ Office DLLs present, but since I didn't want to deploy this application on windows I started looking for a cross-platform solution. I decided to used xlrd, a cross-platform tool compatible with python 2.7. You can get it using pip:
~ $ sudo pip install xlrd
Now for an example:
import xlrd

#open the spreadsheet
workbook = xlrd.open_workbook("test.xls")

#select the first sheet
sheet = workbook.sheet_by_index(0)

#get data from column C (2), row 10 (9)
#non-negative numeration
data = sheet.cell(colx=2,rowx=9).value
print "Cell C,10: %s" % data
It's quite easy, however its best to implement some mapping function, so you don't have to evaluate the column number for every letter (cell AXC, 19221 could be quite tricky ;-))
~KR
Passing django variables to javascript via templates
I can fairly say, that reasonable web applications can't exist without a bit of javascript. We all remember those static web pages that were popular in the late 90'. Well their time is up, professional websites frontend is built using HTML/XHTML/HTML5 + CSS + JS (sometimes Flash).
AJAX requests or newer synchronous pull/push methods enable achieving some dynamic connectivity between frontends and backends. It is also possible to pass some initialization data this way, however if your website architecture is not a real-time client-server (ex. WebSockets) this may be inefficient.
A good practice is initializing JS variables along with rendering pages, so additional initialization request are not required. A simple way of implementing this mechanism is passing JSON encoded data to the template and decoding it in JavaScript. Lets implement the appropriate django view:
This way you will save some resources by reducing the number AJAX calls. Just keep in mind that this will only work for arrays/dictionaries containing primitive types or other arrays.
~KR
AJAX requests or newer synchronous pull/push methods enable achieving some dynamic connectivity between frontends and backends. It is also possible to pass some initialization data this way, however if your website architecture is not a real-time client-server (ex. WebSockets) this may be inefficient.
A good practice is initializing JS variables along with rendering pages, so additional initialization request are not required. A simple way of implementing this mechanism is passing JSON encoded data to the template and decoding it in JavaScript. Lets implement the appropriate django view:
def init_js_template(request):
    import json
    json_data = json.dumps({'test' : '12345', 'arr' : [1,2,3]})
    return render_to_respons('init_json.html', {'json_data':json_data})
And the corresponding javascript initialization in the init_json.html template:This way you will save some resources by reducing the number AJAX calls. Just keep in mind that this will only work for arrays/dictionaries containing primitive types or other arrays.
~KR
Sorting digital photos according to the real creation time using EXIF tags.
Recently I was on a holiday with my friends. Since there were a lot thrilling places to see, almost everybody took a camera. Finally after 8 days of intensive hiking we had over 900 photos taken and we wanted to make a chronological album.
The first problem that occurred to us is that the global image namespace was not continuous (5 different cameras / cellphones with the ability to take photos), and sorting images by their generated names did not solve the it.
Next we tried sorting the images by the file modification date - this was a reasonable approach, but there a few photos which were rotated after fetching them from the memory card causing their modification date to be inadequate for the mentioned problem. Furthermore 2 cameras were configured with an incorrect date / time value.
A few years ago I was implementing an EXIF tag viewer for images, and I remembered that there are tags that store the original image creation time (and quite a few other parameters). I made some research and located a library with python bindings that handles these tags well: pyexiv2.
You may install it using apt-get:
~ $ apt-get install python-pyexiv2
Next I implemented a simple script updates file names so they can be sorted lexicographically according to the real creation time, have a look at the following code:
This script iterates all files in a specific directory ( sys.argv[1] ), filters jpg/png files, reads their exif date and stores pairs: filename, creation datetime in an array. Finally the array is sorted using the real creation datetime, and the images are renamed (with or withour a specific prefix).
Lines 22-26 are a specific exception - we had 2 cameras with an incorrect date, so we have to correct the read value so it may be compared with images from other cameras (evaluated empirically) .
~KR
The first problem that occurred to us is that the global image namespace was not continuous (5 different cameras / cellphones with the ability to take photos), and sorting images by their generated names did not solve the it.
Next we tried sorting the images by the file modification date - this was a reasonable approach, but there a few photos which were rotated after fetching them from the memory card causing their modification date to be inadequate for the mentioned problem. Furthermore 2 cameras were configured with an incorrect date / time value.
A few years ago I was implementing an EXIF tag viewer for images, and I remembered that there are tags that store the original image creation time (and quite a few other parameters). I made some research and located a library with python bindings that handles these tags well: pyexiv2.
You may install it using apt-get:
~ $ apt-get install python-pyexiv2
Next I implemented a simple script updates file names so they can be sorted lexicographically according to the real creation time, have a look at the following code:
import pyexiv2
import sys
import os
import shutil
import datetime
from dateutil.relativedelta import relativedelta

class ExifSort():
    @classmethod
    def _test_extenstion(cls, filename):
        return filename.split(".")[-1].lower() in ['jpg','jpeg','png']
    @classmethod
    def sort_images(cls, path, prefix=None):
        files = []
        for file in os.listdir(path):
            if not cls._test_extenstion(file):
                continue
            metadata = pyexiv2.ImageMetadata(os.path.join(path, file))
            metadata.read()
            try:
                d = metadata['Exif.Photo.DateTimeOriginal'].value
                if metadata['Exif.Image.Make'].value == 'Canon':
                    d+=datetime.timedelta(days=1)
                elif metadata['Exif.Image.Make'].value == 'FUJIFILM':
                    d += relativedelta(years=1)
                    d -= datetime.timedelta(hours=39)

                files.append((file, d, ))
            except:
                print file
                continue

        files.sort(key=lambda x: x[1])
        mag = len(str(len(files)))
        counter = 1
        tmp_prefix = "tmp_"
        for data in files:
            shutil.move(os.path.join(path, data[0]), os.path.join(path, tmp_prefix + data[0]))
        for data in files:
            ext = data[0].split(".")[-1]
            shutil.move(os.path.join(path, tmp_prefix + data[0]),\
                    os.path.join(path, "%s%s.%s" % (prefix or "",\
                    str(counter).rjust(mag,'0'), ext)))
            counter += 1


if __name__ == '__main__':
    try:
        ExifSort.sort_images(sys.argv[1])
    except:
        print "Usage: %s [directory]" % sys.argv[0]
        sys.exit(1)
This script iterates all files in a specific directory ( sys.argv[1] ), filters jpg/png files, reads their exif date and stores pairs: filename, creation datetime in an array. Finally the array is sorted using the real creation datetime, and the images are renamed (with or withour a specific prefix).
Lines 22-26 are a specific exception - we had 2 cameras with an incorrect date, so we have to correct the read value so it may be compared with images from other cameras (evaluated empirically) .
~KR
Friday, August 17, 2012
A quick peek into new django 1.4 feature
Its been a few months since a stable release of django 1.4 has been published. Many of my projects were based on django 1.3, and some even on 1.1. Since they worked there was no sense migrating to the latest version, but recently I started a new project and decided to try out the latest stable version.
The first visible difference is the directory structure, if you for example execute:
a following project directory will be created:
You may now add you apps under the test/test or test directories, this affects the package namespace, this is a nice improvement since it allows you to share your modules not only between your applications but other django projects.
Now lets go to some other major improvements, that have a greater impact on process of building/managing web applications.
The first feature that significantly improves the quality of your code is the ability to implement in-browser test cases. In the previous editions you had to setup curl or write dedicated scripts that simulate user behavior. Django 1.4 is integrated with selenium - one of the most popular browser automation systems, designed for website testing. Yeah, no more situations when somebody actually forgot to commit a template to the production repository.
Another important feature improves the ORM, as from django 1.4 QuerySet's have a method select_for_update(). Now what does it do? I'm speaking rhetorically, of course it implements the SQL: SELECT ... FOR UPDATE which locks the selected rows to prevent other threads modifying them. Now this greatly improves transactional processing.
More features can be found on the official release page https://docs.djangoproject.com/en/dev/releases/1.4/.
As for requirements, the first thing I need to mention is that django 1.4 drops support for python 2.4. Most projects nowadays run on python 2.6 or 2.7, so this shouldn't be a problem. Support for python 3.X is not included, and it probably won't be in the next release aswell. So for now I guess python 2.7 and django 1.4 is the strongest choice.
~KR
The first visible difference is the directory structure, if you for example execute:
~ $ django-admin.py startproject test
a following project directory will be created:
test/
manage.py
test/
settings.py
urls.py
wsgi.py
You may now add you apps under the test/test or test directories, this affects the package namespace, this is a nice improvement since it allows you to share your modules not only between your applications but other django projects.
Now lets go to some other major improvements, that have a greater impact on process of building/managing web applications.
The first feature that significantly improves the quality of your code is the ability to implement in-browser test cases. In the previous editions you had to setup curl or write dedicated scripts that simulate user behavior. Django 1.4 is integrated with selenium - one of the most popular browser automation systems, designed for website testing. Yeah, no more situations when somebody actually forgot to commit a template to the production repository.
Another important feature improves the ORM, as from django 1.4 QuerySet's have a method select_for_update(). Now what does it do? I'm speaking rhetorically, of course it implements the SQL: SELECT ... FOR UPDATE which locks the selected rows to prevent other threads modifying them. Now this greatly improves transactional processing.
More features can be found on the official release page https://docs.djangoproject.com/en/dev/releases/1.4/.
As for requirements, the first thing I need to mention is that django 1.4 drops support for python 2.4. Most projects nowadays run on python 2.6 or 2.7, so this shouldn't be a problem. Support for python 3.X is not included, and it probably won't be in the next release aswell. So for now I guess python 2.7 and django 1.4 is the strongest choice.
~KR
Tuesday, August 7, 2012
Creating multiple isolated python environements on a single OS using virtualenv
If you're doing a lot of coding in python, you probably came to a situation where you had to maintain many projects concurrently. In such situations it is hard to provide apropriate dependant library versions for each project (especially if by any chance those different versions of a particular library lack a compatible API, just like python 2.X and 3.X).
A naive solution would require creating a seperate user profile (or using a virtual machine) for each maintained project. Ok seriously - don't even consider it.
If you want to have mutliple python development/deplyoment envirements you should have a place to store each appropriate set of libraries and interpreters. Secondly you should implement some scripts that run your project with the right environment variables (using the right interpreter).
This approach is better, but it sounds like a lot of work. Happily someone made the job for you. All you need to do is install virtualenv:
~ $ sudo pip install virtualenv
Now to you can configure your isolated python environment:
my_env/
my_env/local
my_env/local/lib
my_env/local/include
my_env/local/bin
my_env/lib
my_env/lib/python2.7
my_env/include
my_env/include/python2.7
my_env/bin
my_env/bin/activate_this.py
my_env/bin/pip-2.7
my_env/bin/easy_install
my_env/bin/pip
my_env/bin/activate
my_env/bin/activate.fish
my_env/bin/python
my_env/bin/activate.csh
my_env/bin/easy_install-2.7
This is a fully functional python environment, in order to activate it you have to load it with source command:
You command prompt should now look similar to this:
(my_env) ~ $
The environment has now been activated, you may now install new libraries using pip or easy install without root privileges. All files will be installed in an appropriate directory in my_env. Running the python command will run an interpreter from the currently active virtual environment.
When you're done having fun, and you want to resume your system environment, just run:
~KR
A naive solution would require creating a seperate user profile (or using a virtual machine) for each maintained project. Ok seriously - don't even consider it.
If you want to have mutliple python development/deplyoment envirements you should have a place to store each appropriate set of libraries and interpreters. Secondly you should implement some scripts that run your project with the right environment variables (using the right interpreter).
This approach is better, but it sounds like a lot of work. Happily someone made the job for you. All you need to do is install virtualenv:
~ $ sudo pip install virtualenv
Now to you can configure your isolated python environment:
~ $ virtualenv my_env --quiet --no-site-packages && find my_env -maxdepth 2
my_env/
my_env/local
my_env/local/lib
my_env/local/include
my_env/local/bin
my_env/lib
my_env/lib/python2.7
my_env/include
my_env/include/python2.7
my_env/bin
my_env/bin/activate_this.py
my_env/bin/pip-2.7
my_env/bin/easy_install
my_env/bin/pip
my_env/bin/activate
my_env/bin/activate.fish
my_env/bin/python
my_env/bin/activate.csh
my_env/bin/easy_install-2.7
This is a fully functional python environment, in order to activate it you have to load it with source command:
~ $ source my_env/bin/activate
You command prompt should now look similar to this:
The environment has now been activated, you may now install new libraries using pip or easy install without root privileges. All files will be installed in an appropriate directory in my_env. Running the python command will run an interpreter from the currently active virtual environment.
When you're done having fun, and you want to resume your system environment, just run:
(my_env) ~ $ deactivate
~ $
You can have as many virtual environments as you like, the current version should even support moving/copying the environment.
Tuesday, July 31, 2012
Potential problems with custom primary keys in django ORM
I had a strange situation lately that encouraged me to do some research about how django really handles primary keys.
As for a mature web framework django's ORM generates automatic integer primary keys if none are present. This feature is cool, cause we are relieved from generating our own primary keys (if its problematic), but we loose some easily accessible semantic information - for example: a car's primary key may be it's registration number instead of a meaningless integer. Whats more, a primary key is used in the default object __eq__ / __cmp__ functions, which makes it easier to filter data (no need for subselects).
But let's look at this situation:
We have a 'Dude' that should have a unique name, primary keys are in general unique so there's no problem here. Suppose we have some form where you add 'dudes'. So we execute:
The logic states, that if you try to create another entry with a same value of a unique field, django should raise an integrity error. Well it will not, because this is also a primary key, if a 'dude' with a specific name exists, django interprets it like this:
For me this was a bit unintuitive, but when think about it - this approach makes sense. All in all, I would recommend using a custom primary_key field only if there is some semantic/logical background behind it.
~KR
As for a mature web framework django's ORM generates automatic integer primary keys if none are present. This feature is cool, cause we are relieved from generating our own primary keys (if its problematic), but we loose some easily accessible semantic information - for example: a car's primary key may be it's registration number instead of a meaningless integer. Whats more, a primary key is used in the default object __eq__ / __cmp__ functions, which makes it easier to filter data (no need for subselects).
But let's look at this situation:
class Dude(models.Model):
name = models.CharField(primary_key=True, max_length=100)
#and so on
We have a 'Dude' that should have a unique name, primary keys are in general unique so there's no problem here. Suppose we have some form where you add 'dudes'. So we execute:
try:
Dude(name='John', **some_fields).save()
#some more code
Dude(name='John', **some_other_fields).save()
print "You don\'t expect to see this message"
except IntegrityError as ie:
pass
The logic states, that if you try to create another entry with a same value of a unique field, django should raise an integrity error. Well it will not, because this is also a primary key, if a 'dude' with a specific name exists, django interprets it like this:
Dude.objects.filter(name='John').update(**some_other_fields)
For me this was a bit unintuitive, but when think about it - this approach makes sense. All in all, I would recommend using a custom primary_key field only if there is some semantic/logical background behind it.
~KR
Sunday, July 29, 2012
A quick look into HTML5 canvas tag
Lately I've experimenting with the new HTML5 features. There are many new tags, and attributes that add new functionality to existing tags. I wouldn't want to get to much into a general preview of these elements, instead I want to focus on single tag: <canvas>. A canvas element/property frequently appears in high level GUI designing programs or interfaces, it allows to draw custom graphics/primitives on a panel. The HTML5 canvas semantic is similar: it allows drawing graphics on the fly! Yes, no more CSS tricks to get an animation running effectively, now all you need is a browser supporting HTML5 and some basic JS knowledge.
Canvas and 2D graphics usually are connected with games, so after getting familiar with some basic concepts I started implementing a simple game - tetris similar. Here's what I have so far:
The currently implemented mechanics include:
Feel free to have a peek at the code, it's far from being tidy - this was just a fast canvas experiment.
The most popular browsers support HTML5, so I don't see any disadvantages in using it in day to day programming.
~KR
Canvas and 2D graphics usually are connected with games, so after getting familiar with some basic concepts I started implementing a simple game - tetris similar. Here's what I have so far:
The currently implemented mechanics include:
- falling bricks (1 type)
- brick stacking (if one lands on another)
- moving bricks left/right (arrow keys, it may not work via iframe)
Feel free to have a peek at the code, it's far from being tidy - this was just a fast canvas experiment.
The most popular browsers support HTML5, so I don't see any disadvantages in using it in day to day programming.
~KR
Tuesday, July 24, 2012
Cheating online games /polls / contests by using anonumous HTTP proxies / python
This post is indeed about cheating. You know those browser-based game profile refs that provide you with some benefits each time a persons clicks it? Thats right, everybody spammed them here and there, some people had many visitors, some had not. I wanted to gain some extra funds too, but the thing I hate more than not-having-extra-funds is spamming... I just felt bad about posting that ref anywhere it was possible, like:
It's quite obvious, that clicking the link again and again yourself didn't have much effect. Only requests with unique IP numbers (daily) where generating profit. So the question was how to access an URI from many IP from one PC (my PC that is). The answer is simple: by using anonymous HTTP proxies.
There are many sites that aggregate lists of free proxies, like proxy-list.org. It's best to find a site that enables fetching proxy IP/PORT data in a script processable way (many sites have captchas).
Let's get to the fun part, the following script executes specific actions for each proxy in the provided list.
1 import socket
2 import urllib
3 import time
4
5 HEADERS = {"User-Agent" : "Mozilla/5.0" }
6
7 proxies = ["10.10.1.1:8080", "192.168.1.1:80"]
8
9 #timeout in case proxy does not respond
10 socket.setdefaulttimeout(5)
11
12 for proxy in proxies:
13 opener = urllib.FancyURLopener({"http" : proxy})
14 opener.addheaders = HEADERS.items()
15 try:
16 res = opener.open("http://some.uri/?ref=123456")
17 res.read()
18 time.sleep(3)
19 except:
20 print "Proxy %s is probably dead :-(" % proxy
21
Line 5 contains a basic User-Agent header, you can find more about setting the appropriate headers here. Line 10 sets the default socket timeout on 5 seconds - many proxies tend not to work 24/7, so best catch those exceptions. Finally we create an opener from each IP and request some resources (our ref link), you might replace this simple request with a set of actions, or even make bots that act via proxies. Just make sure you're proxy is truly anonymous (easy to verify by a simple PHP script) .
This may be called cheating, but at least it's not spamming :-)
~KR
Thursday, July 19, 2012
Frontend number formating - thousands separators and rounding
It's good for a backend developer to do some JS scripting from time to time. Usually this scripting considers the user interface or other presentation mechanisms. Everybody knows that a good user interface has a great impact for attracting people to use your service.
Let's skip positioning/css stuff and move along to data presentation. Usually there is a difference between the data we actually process and the data shown to users. So we have a variable containing the cost of some imaginary service, i.e. 4231.1578. This looks just like an old-school float representation - and in fact it is. So whats wrong with the users?... oops... I mean why is this representation not friendly to users?
Firstly, a common decimal delimiter for European countries is a comma, not a dot - we should respect it.
Secondly, humans do not process text the way machines - the larger the presented amount, the longer it takes to evaluate its value, or even the order of magnitude. Thats why you should provide thousands separators, all in all we get something like this: 4.231,1578
Now all it takes round the value a bit, we don't need so many decimal places. Below the code that converts your js floats to a formatted and readable string (val is the float value, while dec_places is the number of decimal places).
~KR
Let's skip positioning/css stuff and move along to data presentation. Usually there is a difference between the data we actually process and the data shown to users. So we have a variable containing the cost of some imaginary service, i.e. 4231.1578. This looks just like an old-school float representation - and in fact it is. So whats wrong with the users?... oops... I mean why is this representation not friendly to users?
Firstly, a common decimal delimiter for European countries is a comma, not a dot - we should respect it.
Secondly, humans do not process text the way machines - the larger the presented amount, the longer it takes to evaluate its value, or even the order of magnitude. Thats why you should provide thousands separators, all in all we get something like this: 4.231,1578
Now all it takes round the value a bit, we don't need so many decimal places. Below the code that converts your js floats to a formatted and readable string (val is the float value, while dec_places is the number of decimal places).
1 function round_repr(val, dec_places){
2 var tmp = Math.round((val*Math.pow(10, dec_places))).toString();
3 tmp = tmp.slice(0, tmp.length-dec_places) + ',' + tmp.slice(tmp.length-dec_places, tmp.length);
4 var int_length = tmp.length - dec_places - 1 - 3;
5 var i = int_length;
6 for (i=int_length; i>0; i-=3){
7 tmp = tmp.slice(0, i) + "." + tmp.slice(i,tmp.length);
8 }
9 return tmp;
10
11 }
~KR
Monday, July 9, 2012
Make websites recognise python/urllib as a webbrowser - (part 3: managing sessions); loading Firefox cookies to a cookiejar
Most browser based games/applications require a user to authenticate himself before providing access to other functions. A typical login process usually consists of filling out a form (with user credentials and other some other information) and posting it to the server. If the authentication process is completed successfully the server adds a Set-Cookie header with your session cookie to the HTTP response. Setting up urllib to manage cookies may be achieved the following way:
The fun part starts when the authentication is more sophisticated (requires a captcha or other means of security features that discourage the use of robots). We'll just have to login via Firefox and use it's cookies! Firefox stores it's cookies in a sqlite database, we'll just have to open it and fetch them.
In order to make use of this code you have to locate your Firefox cookie file, if you are using linux it will be probably under a path like presented in line 6. Lines 12-19 select cookie data from moz_cookies table and writes them in a LWPCookieJar compatible way in a text file (match filters cookies for a specific domain). Next these cookies are loaded to a cookiejar and installed inside a cookie processor which is added to the default urllib handler list.
This is great, because you can share your session between a webbrowser and web robots.
~KR
By the way: it is best to make a copy of Firefox cookies - when the browser is running the cookie file may be locked which may crash your script or prevent your from getting access to the session.
1 import urllib
2 import urllib2
3 import cookielib
4
5 opener = urllib2.build_opener(urllib2.HTTPCookieProcessor(\
6 cookielib.CookieJar()))
7 urllib2.install_opener(opener)
8
9 login_form = urllib.urlencode({
10 'user' : 'john',
11 'password' : 'secrect_password',
12 })
13
14 req = urllib2.Request('http://some.site/login_resource', login_form)
15 res = urllib2.urlopen(req)
16
The fun part starts when the authentication is more sophisticated (requires a captcha or other means of security features that discourage the use of robots). We'll just have to login via Firefox and use it's cookies! Firefox stores it's cookies in a sqlite database, we'll just have to open it and fetch them.
1 import urllib2
2 import cookielib
3 from sqlite3 import dbapi2
4
5 host = 'some.site'
6 ff_cookie_file= '/home/%s/.mozilla/firefox/%s/cookies.sqlite' % ("user_name", "profile_name")
7
8 file = open("cookie.txt", "w")
9 file.write("#LWP-Cookies-2.0\n")
10 match = '%%%s%%' % host
11
12 con = dbapi2.connect(ff_cookie_file)
13 cur = con.cursor()
14 cur.execute("select name, value, path, host from moz_cookies where host like ?", [match])
15 for item in cur.fetchall():
16 cookie = "Set-Cookie3: %s=\"%s\"; path=\"%s\"; \
17 domain=\"%s\"; expires=\"2038-01-01 00:00:00Z\"; version=0\n" % (
18 item[0], item[1], item[2], item[3],
19 )
20 file.write(cookie)
21 file.close()
22
23 cj = cookielib.LWPCookieJar()
24 cj.load("cookie.txt")
25
26 opener = urllib2.build_opener(urllib2.HTTPCookieProcessor(cj))
27 urllib2.install_opener(opener)
In order to make use of this code you have to locate your Firefox cookie file, if you are using linux it will be probably under a path like presented in line 6. Lines 12-19 select cookie data from moz_cookies table and writes them in a LWPCookieJar compatible way in a text file (match filters cookies for a specific domain). Next these cookies are loaded to a cookiejar and installed inside a cookie processor which is added to the default urllib handler list.
This is great, because you can share your session between a webbrowser and web robots.
~KR
By the way: it is best to make a copy of Firefox cookies - when the browser is running the cookie file may be locked which may crash your script or prevent your from getting access to the session.
Subscribe to:
Posts (Atom)
